Welcome to the Highlight Contour Guide, your ultimate resource for mastering makeup techniques to enhance your natural features. Discover expert tips, essential tools, and step-by-step methods to achieve a professional, sculpted look tailored for both beginners and experienced makeup enthusiasts.

What is Highlighting and Contouring?
Highlighting and contouring are makeup techniques used to create the illusion of depth and dimension on the face. Highlighting involves applying lighter shades to areas you want to draw attention to, such as the high points of your face, like your cheekbones, nose, and cupid’s bow. Contouring, on the other hand, uses darker shades to create shadows, defining areas like the hollows of your cheeks, jawline, and temples. Together, these techniques enhance your natural features, creating a more sculpted and balanced look tailored to your face shape and skin tone.
Importance in Makeup Artistry
Highlighting and contouring are cornerstone techniques in makeup artistry, enabling artists to enhance facial features and create a three-dimensional effect. These methods allow for the manipulation of light and shadow, defining and balancing facial structure. Whether for subtle, natural looks or dramatic transformations, contouring and highlighting are essential skills for makeup professionals. They empower artists to customize makeup according to individual face shapes and skin tones, ensuring a polished and tailored appearance. Mastery of these techniques is fundamental for achieving professional results, making them indispensable in both everyday and high-glamour applications.
Key Principles of Highlighting and Contouring
Mastering light and shadow placement is essential for creating depth and dimension. Proper contouring defines structure, while highlighting enhances natural features, ensuring a balanced, polished look.
Understanding Face Shapes
Identifying your face shape—round, oval, square, or heart-shaped—is crucial for effective contouring and highlighting. Each shape requires tailored techniques to balance proportions and enhance natural features. For round faces, contouring the temples and jawline creates length, while oval faces benefit from subtle definition. Square faces soften with contour along the angles, and heart-shaped faces focus on minimizing the width of the forehead. Understanding your face shape ensures personalized results, allowing you to accentuate your best features and create a harmonious, balanced look. This foundation is key to mastering contouring and highlighting techniques.
Role of Skin Tone
Skin tone plays a pivotal role in contouring and highlighting, as it determines the shade and undertone of products needed to create a natural look. Fair skin tones require lighter, cooler shades, while deeper tones benefit from richer, warmer hues. Undertones—warm, cool, or neutral—guide product selection to ensure seamless blending. For example, peach tones complement fair skin, golden tones suit medium complexions, and deep berry tones enhance richer skin. Matching products to your skin tone ensures a cohesive, natural appearance, avoiding harsh contrasts. Understanding your skin tone is essential for selecting the right contour and highlight shades to enhance your features effectively.
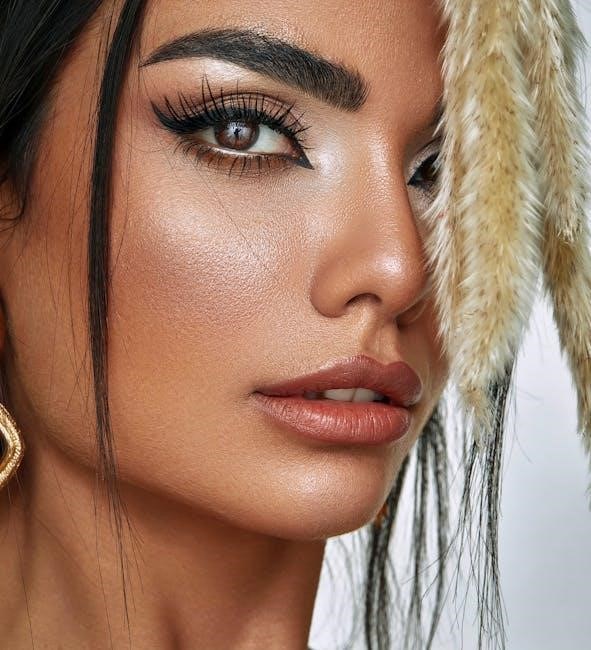
Achieving the 3D Effect
Achieving a 3D effect through contouring and highlighting is about creating depth and dimension on the face. By strategically placing darker shades (contour) in areas you want to recede, such as the hollows of the cheeks, temples, and jawline, and lighter shades (highlight) on areas you want to accentuate, like the high points of the cheekbones, brow bone, and cupid’s bow, you can create a natural, sculpted look. Blending is key to ensuring the transition between shades appears seamless. This technique enhances facial structure, making features stand out while maintaining a natural appearance.
Tools and Products for Highlighting and Contouring
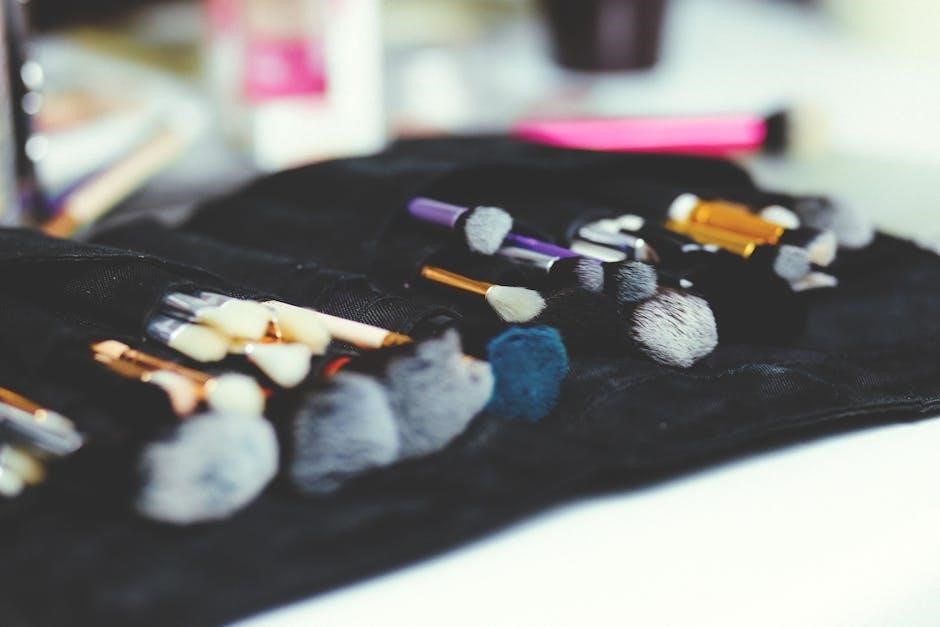
Overview of Essential Tools

Essential tools include contour powders, highlighters, setting sprays, and makeup brushes or sponges for precise application. These products help create defined, long-lasting results for a professional finish.
The right tools and products are crucial for achieving a polished look. Contour powders and highlighters come in various shades to suit different skin tones, while setting sprays ensure longevity. Brushes and sponges are essential for precise application and blending. These tools work together to create a seamless, professional finish. Proper selection and use of these products can elevate your makeup game, helping you achieve the desired sculpted effect. Investing in quality tools and products is key to mastering the art of contouring and highlighting effectively.
Brushes and Sponges
Brushes and sponges are indispensable for contouring and highlighting, offering precision and control. Angled brushes are ideal for contouring, while smaller, rounded brushes work well for targeted areas like the sides of the nose. Makeup sponges, when dampened, help blend products seamlessly, creating a natural finish. For highlighting, flat brushes or fan brushes are perfect for sweeping highlighter across high points of the face. Investing in quality tools ensures smooth application and professional results. Proper care and maintenance of these tools will extend their lifespan and performance.
Contour Powders and Highlighters
Contour powders and highlighters are essential for creating depth and dimension. Choose contour powders one to two shades deeper than your skin tone for a natural look, opting for cooler tones to mimic shadows. Highlighters should complement your skin tone—pearl for fair skin, golden for medium, and bronze for deep tones. Apply contour powders to areas you want to recede, like the hollows of cheeks and jawline. Highlighters brighten high points such as cheekbones, nose, and cupid’s bow. Use light strokes and blend well for a seamless finish, avoiding harsh lines for a natural, radiant appearance.
Setting Sprays
Setting sprays are a crucial final step in your contour and highlight routine. They help extend the wear of your makeup, prevent oiliness, and ensure a flawless finish. Opt for a matte setting spray if you have oily skin or prefer a natural look, or a hydrating formula for dry skin. Illuminating setting sprays can add a subtle radiance to your complexion. Hold the bottle 6-8 inches away and mist evenly over your face. This step seals your contour and highlight, blending the products for a seamless, long-lasting result. Use sparingly to avoid over-saturating the skin.
Step-by-Step Guide to Highlighting and Contouring
Master the art of contouring and highlighting with this detailed guide. Learn essential techniques to sculpt, enhance, and define your features for a professional finish.
Preparing Your Skin
Before contouring and highlighting, ensure your skin is well-prepared for a smooth, even application. Start with a cleansed face, followed by moisturizer to hydrate and balance your skin tone. Allow the moisturizer to absorb fully. Next, apply a lightweight primer to create an even canvas and extend the wear of your makeup. This step helps your contour and highlight products blend seamlessly and last longer. Proper skin preparation ensures a natural, flawless finish and enhances the effectiveness of your makeup techniques.
Applying Base Makeup
Begin by applying a lightweight primer to create a smooth canvas for your makeup. Follow with a foundation that matches your skin tone, blending it evenly across your face using a brush, sponge, or your fingers. Ensure full coverage by buffing the product into the skin, especially around the hairline, jawline, and edges. Concealer can be used sparingly to cover blemishes or dark spots. Finish by setting your base with a translucent powder to prevent oiliness and extend wear. A well-applied base ensures your contour and highlight blend seamlessly, creating a natural, polished look.
Contouring Techniques
Contouring involves using darker shades to create depth and definition. Start by applying a light layer of contour powder to the hollows of your cheeks, temples, and jawline. Use gentle, sweeping strokes with a contour brush for a natural look. For a more defined jawline, blend the contour product along the edge, ensuring no harsh lines. To slim the nose, apply a thin line of contour on either side. Remember to blend thoroughly for a seamless finish. Build color gradually, as it’s easier to add more product than to remove excess. This technique enhances facial structure and creates dimension.
Highlighting Techniques
Highlighting enhances your natural features by applying light shades to high points of your face. Use a highlighter on areas like the tops of your cheekbones, brow bone, cupid’s bow, and nose bridge. Apply with a small brush or beauty sponge for precision. Start with a light layer and build as needed for a radiant glow. Blend gently to avoid harsh lines, ensuring a seamless transition into your skin tone. For a natural look, focus on one or two key areas. This technique brightens your complexion and creates a lifted, youthful appearance, perfect for both everyday and glamour makeup looks.
Blending for a Natural Look
Blending is key to achieving a natural, seamless finish when contouring and highlighting. Use a fluffy brush or beauty sponge to soften harsh lines, ensuring contour and highlight areas merge effortlessly. Focus on feathering edges outward for a subtle transition. Apply light layers, blending as you go to prevent heavy buildup. This technique creates depth without looking artificial. Gently sweep across the jawline, temples, and under the cheekbones to diffuse contour shades. For highlights, blend upward and outward on high points like the tops of cheekbones and brow bone. Proper blending ensures your makeup looks like second skin, enhancing your features naturally.
Finishing Touches
The final step in your contouring and highlighting routine is setting everything in place. Lightly mist a setting spray to ensure longevity and prevent caking. Enhance your natural features by defining lashes with mascara and adding a touch of color to your lips. For a polished look, blend any remaining edges and soften harsh lines. Subtle tweaks, like dabbing concealer under the eyes or adding a hint of gloss, can elevate your look. Finish by ensuring all areas are seamless and your skin appears radiant. These final touches refine your contour and highlight, creating a cohesive, professional finish perfect for any occasion.
Contouring and Highlighting for Different Face Shapes
Contouring and highlighting techniques vary based on face shape to balance proportions and enhance features. This guide provides tailored advice for round, oval, square, and heart-shaped faces to achieve harmony and definition.
Round Face
For round faces, contouring focuses on creating length and angles. Apply contour along the temples, hollows of the cheeks, and jawline to define and slim the face. Highlight the forehead, under the eyes, and chin to draw light and balance proportions. Blend thoroughly to ensure a natural transition between shades. Avoid heavy contouring on the sides, as this can accentuate roundness. Instead, emphasize vertical contours to elongate the face. This technique helps create a more balanced, structured appearance while maintaining soft, feminine features.
Oval Face
Oval faces are versatile and balanced, allowing for a variety of contouring and highlighting techniques. To enhance natural symmetry, apply contour to the hollows of the cheeks, temples, and jawline to create depth. Highlight the high points of the cheekbones, nose bridge, and cupid’s bow to draw light and enhance features. Oval faces can handle both subtle and bold looks, making them ideal for experimenting with different techniques. Blend softly to maintain a natural appearance, ensuring the contour and highlight complement the face’s inherent balance. This approach accentuates the oval shape while adding dimension and radiance.
Square Face
For a square face, contouring and highlighting aim to soften strong angles and create a more balanced look. Apply contour to the temples, jawline, and sides of the nose to reduce sharpness. Highlight the under-eye area, brow bone, and center of the nose to draw light and soften features. Use lighter shades to create a natural, radiant glow. Avoid harsh lines by blending thoroughly. This technique helps elongate the face and create a smoother, more oval appearance. Tailor your approach to enhance softness while maintaining definition, ensuring a polished and elegant finish.
Heart-Shaped Face
For a heart-shaped face, contouring and highlighting focus on balancing the broader upper half with the narrower lower half. Apply contour to the temples and along the jawline to minimize width. Highlight the center of the forehead, under-eye area, and chin to draw attention downward, creating a longer, more balanced appearance. Use lighter shades on the lower face to elongate it. Soft blending is key to avoid harsh transitions. This technique helps create a harmonious, more oval-like silhouette while enhancing natural beauty. Tailor your approach to soften angles and create a radiant, polished look tailored to your unique features.

Tips for Common Skin Concerns
Address acne-prone skin with gentle, non-comedogenic products. For dull skin, exfoliate before contouring and use brightening highlighters. Sensitive skin benefits from hypoallergenic formulas and light application.
Acne-Prone Skin
For acne-prone skin, opt for non-comedogenic, hypoallergenic products to avoid clogged pores. Use light, gentle strokes when applying contour and highlight to prevent irritation. Avoid heavy layers, as they can accentuate breakouts. Instead, focus on subtle definition and blending. Look for products labeled “oil-free” or “mineral-based” to maintain a balanced skin tone. Apply concealer sparingly to cover blemishes before contouring. Blend thoroughly to create a seamless finish without aggravating sensitive areas. Setting your look with a light dusting of translucent powder helps maintain control over shine and texture.
Dull Skin
For dull skin, focus on enhancing radiance while maintaining a natural glow. Use hydrating, lightweight products to avoid accentuating dryness. Apply highlighter to high points like the tops of cheekbones, brow bone, and cupid’s bow to brighten the complexion. Opt for luminous, sheer formulas rather than heavy pigments. Avoid over-contouring, as it can deepen shadows and make the skin appear flatter. Instead, use subtle bronzer to add warmth and dimension without dulling the skin. Blend thoroughly and finish with a setting spray to lock in moisture and maintain a fresh, radiant look throughout the day.
Sensitive Skin
For sensitive skin, prioritize gentle, hypoallergenic products to avoid irritation. Opt for mineral-based highlighters and contour powders, as they are often fragrance-free and non-comedogenic. Apply with light, soft strokes using a brush or sponge to minimize friction. Highlight high points like cheekbones, brow bones, and the cupid’s bow to add radiance without overloading the skin. For contouring, use a sheer bronzer on areas like the sides of the nose and jawline. Blend softly to prevent harsh lines and irritation. Set with a gentle setting spray to maintain the look without drying out the skin;
Common Mistakes to Avoid
Avoid over-contouring, which can make features appear harsh. Use light strokes and blend thoroughly. Incorrect placement and insufficient blending are common errors that disrupt the natural look. Be mindful of these pitfalls.
Over-Contouring
Over-contouring is a common mistake that can make your features appear unnatural and harsh. It happens when too much product is applied or blended poorly. Start with light strokes and build gradually for a subtle effect. Avoid using dark shades that are too stark for your skin tone, as this can create an unflattering contrast. Instead, opt for soft, blendable formulas and focus on defining key areas like the hollows of the cheeks and jawline. Remember, the goal is to enhance, not overpower, your natural contours.
Incorrect Placement
Incorrect placement is a common mistake that can disrupt the balance of your facial features. Contouring too low on the cheekbones or too close to the hairline can create an unnatural, boxy appearance. Similarly, highlighting areas like the forehead or nose tip excessively can draw attention away from your best features. To avoid this, focus on contouring the hollows of the cheeks, temples, and jawline, while highlighting the high points such as the tops of cheekbones, brow bone, and cupid’s bow. Proper placement enhances your natural structure without looking artificial.
Insufficient Blending
Insufficient blending is a common oversight that can make contouring and highlighting look harsh and unnatural. Failing to blend properly creates sharp lines and noticeable transitions between products, drawing attention to the makeup rather than enhancing your features. To avoid this, use light strokes with a brush or sponge to merge the edges of contour and highlight seamlessly. Focus on blending toward the hairline, jawline, and temples. Translucent powder can also help soften harsh lines, ensuring a smooth, effortless finish that enhances your natural contours without appearing artificial or overdone.
Frequently Asked Questions
Explore common queries about highlight and contour techniques, product choices, and maintenance. Find expert answers to help you master these makeup skills with confidence and ease.
Choosing the Right Products
Selecting the right products for highlighting and contouring is crucial for achieving a natural, sculpted look. Start by considering your skin tone and undertones—cool, warm, or neutral. For contouring, opt for a shade one to two tones deeper than your foundation, while highlighters should complement your skin’s natural glow. Powder, cream, or liquid formulas are available, with powders offering easy blending and creams providing a radiant finish. Invest in a contour brush or beauty sponge for precise application. Always test products on your jawline to ensure a seamless match. Remember, the right tools and shades can elevate your makeup game significantly!
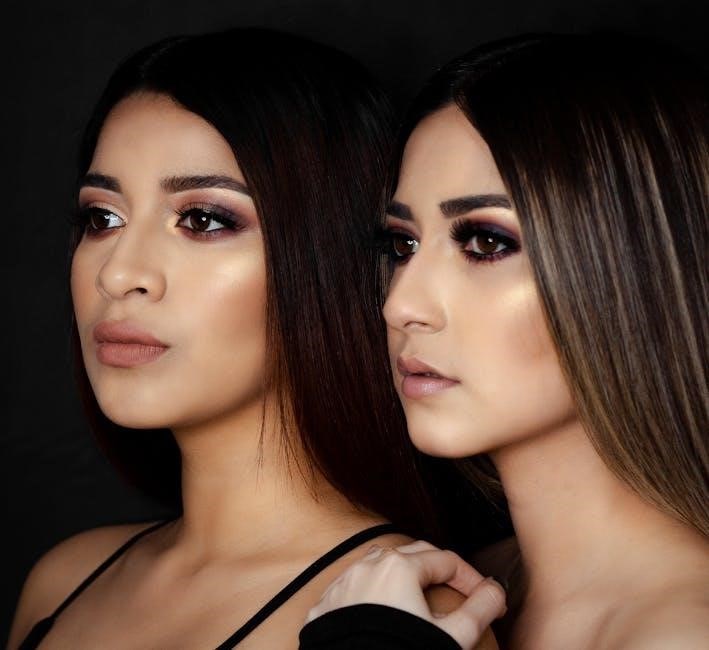
Everyday vs. Glamour Looks
Highlighting and contouring can be tailored to suit both everyday and glamour looks. For a natural, everyday appearance, use light, subtle shades to softly define features. Opt for a sheer highlighter and a contour tone close to your skin tone for a effortless, “no-makeup” effect. Glamour looks, however, call for bolder contrasts—darker contours and brighter highlights to create dramatic depth and dimension. Layer products for intensity and blend thoroughly for a seamless finish. Whether you’re aiming for understated elegance or red-carpet-ready drama, the key is balancing technique and product choice to match your desired aesthetic and occasion.
Maintenance and Touch-Ups

To keep your contour and highlight looking fresh all day, use a setting spray after application to prevent fading. For touch-ups, gently blot oily areas with oil-absorbing sheets instead of reapplying powder, as this can cake. Carry a small contour and highlight palette for quick adjustments. Blend lightly with your fingers or a brush to maintain a seamless finish. Avoid over-touching, as this can disrupt the makeup. For longer-lasting results, layer cream or liquid products under powders and set with translucent powder. Regularly cleaning your tools ensures precise application during touch-ups.

Product Recommendations
For contouring, try MAC Pro Longwear Concealer or NARS Laguna Bronzer. Highlight with Becca Shimmering Skin Perfector or MAC Strobe Cream. NYX and Wet n Wild offer affordable alternatives.
For Different Skin Tones
Choosing the right products for your skin tone is key. For fair skin, opt for soft peach highlighters like MAC Strobe Cream and light taupe contours. Medium skin tones look stunning with golden highlighters like Becca Champagne Pop and bronzy contours such as NARS Laguna. Deep skin tones shine with rich bronze highlighters like Fenty Beauty Trophy and cool-toned contours like Anastasia Beverly Hills Chocolate. Always match undertones—cool for pinkish skin, warm for golden, and neutral for balanced tones. This ensures a seamless, natural-looking finish tailored to your complexion.
Drugstore vs. High-End
Drugstore products like Maybelline Master Contour and NYX Highlighter offer affordable, accessible options for everyday use. High-end brands such as Charlotte Tilbury and Tom Ford provide luxurious textures and pigmentation for a more polished look. While drugstore options are budget-friendly and sufficient for subtle effects, high-end products often deliver better longevity and blendability. Choose based on your budget and desired finish—both categories have excellent options for achieving professional results. Experiment to find what works best for you and your makeup goals;
Mastering the art of highlighting and contouring is a journey that combines skill, creativity, and practice. Whether you’re aiming for a natural glow or a dramatic transformation, these techniques empower you to enhance your features and boost confidence. Remember, the right tools, products, and techniques can make all the difference. Experiment with drugstore and high-end options to find what works best for you. With patience and practice, you’ll unlock the full potential of your makeup routine and achieve a flawless, sculpted look that highlights your unique beauty.