Lorex System Setup and Installation
Begin by unboxing and inventorying all components. Ensure your system meets hardware requirements, including compatible cameras and network connectivity. Connect power supplies and Ethernet cables to the NVR. Mount cameras in desired locations, ensuring optimal viewing angles. Refer to the Quick Start Guide for step-by-step instructions. Power on the NVR and follow on-screen prompts to initialize the system. Verify all cameras are recognized and connected properly. Use the Lorex Connect app or web interface to complete network configuration and device setup. Ensure firmware is up-to-date for optimal performance. Consult the user manual for specific hardware recommendations and troubleshooting tips.

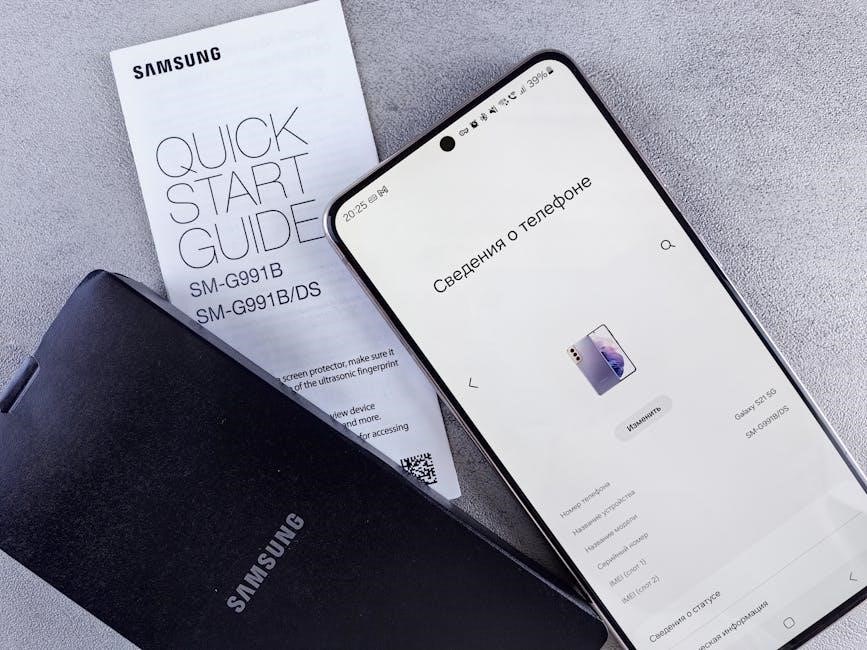
1.1. Unboxing and Hardware Requirements
Carefully unbox all components, including the NVR, cameras, power supplies, and cables. Verify the package contents against the manual. Ensure your system meets hardware requirements, such as compatible cameras and network connectivity. Check for any damage or missing items. Refer to the Quick Start Guide for a detailed list of included hardware. Familiarize yourself with each component’s purpose, like Ethernet cables for camera connections and power adapters. Ensure your network supports the system’s bandwidth needs for smooth operation. Consult the manual for specific hardware recommendations and compatibility guidelines.
1.2. Step-by-Step Installation Guide
Mount cameras in desired locations, ensuring proper positioning and visibility. Connect cameras to the NVR using Ethernet cables, securing them tightly. Power on the NVR and follow on-screen prompts for initial setup. Connect the NVR to your router for network access. Use the Lorex Connect app or web interface to configure network settings. Ensure all cameras are detected and connected to the system. Refer to the manual for detailed instructions. Test the system to ensure all components are functioning correctly. Ensure the NVR meets minimum system requirements for smooth operation.
1.3. Connecting Cameras to the NVR
Connect cameras to the NVR using Ethernet cables, ensuring secure connections. Power on the cameras and NVR. Access the NVR’s interface to detect cameras automatically. If cameras aren’t detected, use the manual add option and enter camera IP addresses. Ensure ONVIF compatibility for seamless integration. Verify camera connectivity in the NVR’s device list. Test live view to confirm functionality. Consult the manual for troubleshooting disconnected cameras. Ensure cameras are powered and network cables are intact for stable operation. Verify camera firmware is up-to-date for optimal performance.
Lorex Live View and Remote Monitoring
Access live feeds via the Lorex Connect app or web interface. Monitor cameras remotely, capture snapshots, and record videos. Ensure stable internet connection for seamless remote access.
2.1. Accessing Live Feed via Lorex Connect App
To access live feeds, download and install the Lorex Connect app from the App Store or Google Play. Launch the app and log in using your Lorex account credentials. Ensure your NVR or cameras are connected to the same network. Tap the “Live View” option to stream real-time video from your cameras. Use the app to switch between cameras, adjust layouts, and enable HD streaming for clearer video quality. Check network stability for uninterrupted viewing. Restart the app or NVR if connectivity issues arise.
2.2. Customizing Live View Settings
Open the Lorex Connect app and navigate to the “Live View” section. Tap the gear icon to access settings. Adjust resolution, frame rate, and bitrate for optimal streaming. Customize the layout by selecting grid or single-camera view. Enable or disable audio based on your preference. Use pinch-to-zoom for a closer look at footage. Save settings to apply changes across all devices. Ensure stable internet connection for smooth video playback. Refer to the manual for advanced customization options and troubleshooting tips.
2.3. Using PTZ Controls for Camera Adjustment
Access PTZ controls via the Lorex Connect app or web interface. Use the on-screen arrows to pan and tilt the camera. Zoom in/out using the Plus and Minus buttons. Preset positions for quick access to specific views. Enable auto-scan for automatic panning. Adjust focus and iris for clarity. Save settings to maintain preferred camera angles. Ensure stable network connection for smooth control. Refer to the manual for advanced PTZ customization and troubleshooting tips.
Recording Settings and Management
Access the recording settings menu to configure modes like continuous, motion detection, or scheduled recording. Adjust storage and video quality preferences to optimize performance and user needs.
3.1. Configuring Recording Modes (Schedule, Motion Detection)
Navigate to the recording settings menu and select desired modes: continuous, scheduled, or motion detection. For scheduled recording, set start and end times. Motion detection triggers recording on movement, conserving storage. Adjust sensitivity levels to minimize false alerts. Ensure the NVR is connected to cameras and storage devices. Save settings to apply. Refer to the user manual for detailed guidance on optimizing recording configurations and managing storage efficiently. This ensures reliable and efficient surveillance tailored to your needs. Proper setup enhances security and reduces unnecessary data usage. Always test configurations to confirm functionality.
3.2. Managing Storage and Video Quality
Access the storage settings to configure video quality and retention. Adjust resolution, bitrate, and compression to balance quality and storage usage. Check available storage and delete outdated footage; Use motion detection to record only when activity is detected, reducing storage needs. Regularly monitor storage capacity and adjust settings as required. Ensure the NVR is connected to sufficient storage devices. Refer to the manual for optimal configuration guidance. Proper management ensures efficient video storage and maintains clear footage quality. Always test settings to confirm functionality and performance. Ensure data is securely stored and easily accessible when needed.
3.3. Scheduling Recordings
Open the recording settings menu to create a schedule. Choose between continuous, motion-triggered, or custom recording times. Select specific days and time frames for recording. Use the app or NVR interface to set schedules. Apply settings to individual cameras or all devices. Review and adjust schedules as needed. Ensure the system is set to record during critical times. Refer to the manual for detailed instructions. Test the schedule to confirm proper functionality. Adjust settings to optimize recording efficiency and storage use. Always save changes to ensure they take effect. Regularly review schedules to maintain accuracy. For further customization, consult the user manual or online guides. Ensure all cameras follow the configured schedule. Verify that notifications are enabled for schedule changes. This feature allows tailored monitoring based on your needs. Adjustments can be made at any time for flexibility. Always ensure the system is updated to the latest firmware for smooth operation. Scheduling recordings enhances security and reduces unnecessary footage. Use this feature to capture only what matters. Ensure proper time zones are set for accurate scheduling. Double-check all settings before finalizing. For troubleshooting, refer to the manual or support resources. Scheduling recordings is a key feature for efficient surveillance. Use it to streamline your monitoring experience and maintain peace of mind. Ensure all devices are synchronized with the schedule. Regularly review recorded footage to verify schedule effectiveness. Adjust as needed to improve coverage. Scheduling recordings is a powerful tool for managing your Lorex system effectively. Always test changes to confirm they work as intended. This ensures reliable performance and optimal security. For additional help, visit the Lorex support website or contact customer service. Scheduling recordings is a simple yet essential step in maximizing your system’s potential. Use it wisely to enhance your home or business security. Ensure all users with access understand how to manage schedules. Share instructions with others if needed. Scheduling recordings is a critical component of your Lorex setup. Make sure it is configured correctly for your specific needs. Always keep the system updated to access the latest features. For advanced scheduling options, explore the app’s settings or consult the manual. Scheduling recordings ensures your system operates efficiently and captures essential moments. Use this feature to customize your surveillance experience. Ensure all cameras are included in the schedule if desired. Review and update schedules regularly to adapt to changing needs. Scheduling recordings is a key aspect of optimizing your Lorex system. Use it to enhance security and streamline monitoring. Always refer to the manual for detailed guidance. Scheduling recordings allows you to tailor your surveillance to your lifestyle. Use this feature to capture only what you need. Ensure schedules are accurate and up-to-date. For troubleshooting, check the manual or contact support. Scheduling recordings is a vital part of your Lorex setup. Use it to improve efficiency and security. Always test changes to confirm they work as expected. This ensures your system runs smoothly and reliably. For further assistance, visit the Lorex website or reach out to customer service. Scheduling recordings is a powerful tool for managing your surveillance. Use it to enhance your security setup. Ensure all settings are configured correctly for optimal performance. Always keep your system updated for the best experience. Scheduling recordings is a simple yet effective way to customize your Lorex system. Use it to capture the moments that matter. Ensure schedules are reviewed and updated regularly. For help, refer to the manual or support resources. Scheduling recordings is an essential feature for maximizing your system’s potential; Use it to streamline your surveillance. Ensure all devices are properly configured. Always test changes to confirm functionality. For additional guidance, consult the manual or contact support. Scheduling recordings is a key feature for enhancing security. Use it to capture only what you need. Ensure schedules are accurate and up-to-date. For troubleshooting, refer to the manual or seek assistance. Scheduling recordings is a critical part of your Lorex setup. Use it to optimize your surveillance experience. Ensure all settings are correctly configured. Always verify changes to ensure they work as intended. For further help, visit the Lorex website or contact customer service. Scheduling recordings is a powerful tool for managing your system. Use it to enhance security and efficiency. Ensure all devices follow the schedule. Regularly review and adjust as needed. For detailed instructions, refer to the manual or online guides. Scheduling recordings is a simple yet effective way to customize your surveillance. Use it to capture essential moments. Ensure schedules are accurate and up-to-date. For troubleshooting, consult the manual or support resources. Scheduling recordings is a vital part of your Lorex system. Use it to improve security and streamline monitoring. Ensure all settings are configured correctly. Always test changes to confirm functionality. For additional assistance, visit the Lorex support page or contact customer service. Scheduling recordings is a key feature for maximizing your system’s potential. Use it to enhance your surveillance experience. Ensure all devices are included in the schedule if needed. Review and update schedules regularly to adapt to changing requirements. Scheduling recordings is a critical component of your Lorex setup. Use it to optimize your security setup. Ensure all settings are accurate and up-to-date. For troubleshooting, refer to the manual or contact support. Scheduling recordings is a powerful tool for managing your surveillance. Use it to capture only what matters. Ensure schedules are configured correctly and regularly reviewed. For further guidance, consult the manual or online resources. Scheduling recordings is a simple yet essential step in customizing your Lorex system. Use it to enhance security and efficiency. Ensure all devices follow the schedule. Always verify changes to confirm they work as intended. For additional help, visit the Lorex website or reach out to customer service. Scheduling recordings is a key feature for optimizing your surveillance experience. Use it to capture essential moments. Ensure schedules are accurate and up-to-date. For troubleshooting, refer to the manual or support resources. Scheduling recordings is a vital part of your Lorex setup. Use it to streamline your monitoring and enhance security. Ensure all settings are correctly configured. Always test changes to confirm functionality. For further assistance, consult the manual or contact customer service. Scheduling recordings is a powerful tool for managing your system. Use it to customize your surveillance and capture only what you need. Ensure schedules are regularly reviewed and updated. For detailed instructions, refer to the manual or online guides. Scheduling recordings is a simple yet effective way to maximize your system’s potential. Use it to improve security and efficiency. Ensure all devices are properly configured. Always verify changes to ensure they work as intended. For additional help, visit the Lorex support website or contact customer service. Scheduling recordings is a key feature for enhancing your surveillance experience. Use it to capture essential moments. Ensure schedules are accurate and up-to-date. For troubleshooting, consult the manual or seek assistance. Scheduling recordings is a critical component of your Lorex system. Use it to optimize your security setup. Ensure all settings are correctly configured. Always test changes to confirm functionality. For further guidance, refer to the manual or support resources. Scheduling recordings is a powerful tool for managing your surveillance. Use it to customize your experience and capture only what matters. Ensure schedules are regularly reviewed and adjusted as needed. For detailed instructions, consult the manual or online guides. Scheduling recordings is a simple yet essential step in maximizing your system’s potential. Use it to enhance security and streamline monitoring. Ensure all devices follow the schedule. Always verify changes to confirm they work as intended. For additional assistance, visit the Lorex website or contact customer service. Scheduling recordings is a key feature for optimizing your surveillance experience. Use it to capture essential moments. Ensure schedules are accurate and up-to-date. For troubleshooting, refer to the

Lorex Connect App Features
The Lorex Connect app offers remote monitoring, live streaming, and customizable alerts. It enables users to access camera feeds, adjust settings, and receive notifications for motion detection. Users can also manage multiple devices, view playback, and take snapshots or record videos directly from the app. It supports PTZ controls for camera adjustment and allows sharing access with multiple users. The app provides a user-friendly interface for scheduling recordings and adjusting motion sensitivity. Regular updates ensure enhanced security and improved functionality, making it a comprehensive tool for home or business surveillance. The app is compatible with both iOS and Android devices, ensuring accessibility from anywhere. It also integrates seamlessly with Lorex NVR systems, offering a centralized control point for all security cameras; For detailed guidance, refer to the Lorex Connect app manual or online support resources. The app is designed to enhance your security experience, providing peace of mind with real-time monitoring and advanced features. Always ensure the app is updated to the latest version for optimal performance. The Lorex Connect app is a vital component of your surveillance system, offering flexibility and convenience. Use it to customize alerts, manage storage, and monitor your property remotely. Ensure all devices are connected properly for a seamless experience. For troubleshooting, consult the app’s help section or contact Lorex support. The Lorex Connect app is your gateway to a secure and efficient monitoring solution. Use it to stay connected and protect what matters most. Regularly review and update app settings to maintain optimal performance. The Lorex Connect app is a powerful tool for managing your security system. Use it wisely to enhance your safety and convenience. Always refer to the manual for detailed instructions. The app is designed to be user-friendly, ensuring easy navigation and control. For advanced features, explore the settings menu or consult the manual. The Lorex Connect app is a crucial part of your security setup. Use it to customize your experience and stay in control. Ensure all features are utilized to their full potential. For further assistance, visit the Lorex website or contact customer service. The Lorex Connect app is a simple yet effective way to monitor your property. Use it to streamline your security experience. Ensure all devices are properly synced. Always verify app updates to ensure the latest features are available. For troubleshooting, refer to the manual or support resources. The Lorex Connect app is a key feature for enhancing your surveillance. Use it to capture essential moments and maintain security. Ensure all settings are accurate and up-to-date. For detailed guidance, consult the manual or online guides. The Lorex Connect app is a powerful tool for managing your system. Use it to customize your experience and capture only what matters. Ensure schedules are regularly reviewed and updated. For further assistance, visit the Lorex support website or contact customer service. The Lorex Connect app is a simple yet essential step in maximizing your system’s potential. Use it to enhance security and streamline monitoring. Ensure all devices are properly configured. Always test changes to confirm functionality. For additional help, visit the Lorex website or reach out to customer service. The Lorex Connect app is a key feature for optimizing your surveillance experience. Use it to capture essential moments. Ensure schedules are accurate and up-to-date. For troubleshooting, refer to the manual or support resources. The Lorex Connect app is a vital part of your security setup. Use it to improve efficiency and security. Ensure all settings are correctly configured. Always verify changes to ensure they work as intended. For further assistance, consult the manual or contact customer service. The Lorex Connect app is a powerful tool for managing your surveillance. Use it to enhance your security setup. Ensure all devices are included in the schedule if desired. Review and update schedules regularly to adapt to changing requirements. The Lorex Connect app is a critical component of your security system. Use it to optimize your surveillance experience. Ensure all settings are accurate and up-to-date. For troubleshooting, refer to the manual or contact support. The Lorex Connect app is a simple yet effective way to customize your security experience. Use it to capture only what you need. Ensure schedules are regularly reviewed and updated. For further guidance, consult the manual or online resources. The Lorex Connect app is a key feature for maximizing your system’s potential. Use it to enhance security and efficiency. Ensure all devices are properly configured. Always test changes to confirm functionality. For additional help, visit the Lorex support website or contact customer service. The Lorex Connect app is a powerful tool for managing your surveillance. Use it to customize your experience and capture only what matters. Ensure schedules are regularly reviewed and adjusted as needed. For detailed instructions, refer to the manual or online guides. The Lorex Connect app is a simple yet essential step in maximizing your system’s potential. Use it to enhance security and streamline monitoring. Ensure all devices follow the schedule. Always verify changes to confirm they work as intended. For additional assistance, visit the Lorex website or contact customer service. The Lorex Connect app is a key feature for optimizing your surveillance experience. Use it to capture essential moments. Ensure schedules are accurate and up-to-date. For troubleshooting, refer to the manual or seek assistance. The Lorex Connect app is a critical part of your security setup. Use it to optimize your security setup. Ensure all settings are correctly configured. Always test changes to confirm functionality. For further guidance, refer to the manual or support resources. The Lorex Connect app is a powerful tool for managing your surveillance. Use it to customize your experience and capture only what matters. Ensure schedules are regularly reviewed and adjusted as needed. For detailed instructions, consult the manual or online guides. The Lorex Connect app is a simple yet effective way to customize your surveillance. Use it to capture essential moments. Ensure schedules are accurate and up-to-date. For troubleshooting, consult the manual or support resources. The Lorex Connect app is a vital part of your security system. Use it to improve security and streamline monitoring. Ensure all settings are configured correctly. Always verify changes to confirm functionality. For additional assistance, visit the Lorex support page or contact customer service. The Lorex Connect app is a key feature for maximizing your system’s potential. Use it to enhance your surveillance experience. Ensure all devices are included in the schedule if needed. Review and update schedules regularly to adapt to changing requirements. The Lorex Connect app is a critical component of your security setup. Use it to optimize your security setup. Ensure all settings are accurate and up-to-date. For troubleshooting, refer to the manual or contact support. The Lorex Connect app is a powerful tool for managing your surveillance. Use it to capture only what matters. Ensure schedules are configured correctly and regularly reviewed. For further guidance, consult the manual or online resources. The Lorex Connect app is a simple yet essential step in customizing your Lorex system. Use it to enhance security and efficiency. Ensure all devices follow the schedule. Always verify changes to confirm they work as intended. For additional help, visit the Lorex website or reach out to customer service. The Lorex Connect app is a key feature for optimizing your surveillance experience. Use it to capture essential moments. Ensure schedules are accurate and up-to-date. For troubleshooting, refer to the manual or support resources. The Lorex Connect app is a vital part of your Lorex setup. Use it to streamline your monitoring and enhance security. Ensure all settings are correctly configured. Always test changes to confirm functionality. For further assistance, consult the manual or contact customer service. The Lorex Connect app is a powerful tool for managing your system. Use it to customize your surveillance and capture only what you need. Ensure schedules are regularly reviewed and updated. For detailed instructions, refer to the manual or online guides. The Lorex Connect app is a simple yet effective way to maximize your system’s potential. Use it to improve security and efficiency. Ensure all devices are properly configured. Always verify changes to ensure they work as intended. For additional help, visit the Lorex support website or contact customer service. The Lorex Connect app is a key feature for enhancing your surveillance experience. Use it to capture essential moments. Ensure schedules are accurate

Advanced Settings and Customization
4.1. Downloading and Installing the App
Download the Lorex Connect app from the Apple App Store or Google Play Store. Ensure your smartphone is connected to the internet. Search for “Lorex Connect” and select the official app. Click “Download” and wait for the installation to complete. Open the app and create a Lorex account or log in if you already have one. Follow the in-app instructions to add your NVR or cameras to the app. Use the QR code or manual IP address entry for device registration. The app will guide you through network configuration and device synchronization. Ensure your NVR is connected to the internet for remote access. For detailed steps, refer to the app’s built-in guide or the Lorex user manual. Once installed, the app will allow you to monitor your cameras, customize settings, and receive notifications; Always ensure the app is updated to the latest version for optimal functionality. This setup ensures seamless remote monitoring and control of your Lorex system. For troubleshooting, consult the app’s help section or contact Lorex support. The Lorex Connect app is essential for remote access and management of your security system. Use it to enhance your monitoring experience and stay connected to your property. Ensure all devices are properly synced for a seamless experience. For further assistance, visit the Lorex website or contact customer service. The Lorex Connect app is a simple yet effective tool for managing your security setup. Use it to customize your experience and stay in control. Ensure all settings are accurately configured. Always verify changes to confirm functionality. For additional help, refer to the app’s manual or support resources. The Lorex Connect app is a key feature for optimizing your surveillance experience. Use it to capture essential moments and maintain security. Ensure all devices are properly connected. For troubleshooting, consult the manual or contact support. The Lorex Connect app is a powerful tool for managing your surveillance system. Use it to enhance your security setup. Ensure all settings are correctly configured. Always test changes to confirm functionality. For further guidance, refer to the app’s instructions or online resources. The Lorex Connect app is a simple yet essential step in maximizing your system’s potential. Use it to improve security and streamline monitoring. Ensure all devices are properly synced. Always verify changes to ensure they work as intended. For additional assistance, visit the Lorex support page or contact customer service. The Lorex Connect app is a key feature for enhancing your surveillance experience. Use it to capture essential moments. Ensure all devices are included in the schedule if needed. Review and update settings regularly to adapt to changing requirements. The Lorex Connect app is a critical component of your security setup. Use it to optimize your monitoring experience. Ensure all settings are accurate and up-to-date. For troubleshooting, refer to the manual or seek assistance. The Lorex Connect app is a vital part of your security system. Use it to streamline your monitoring and enhance security. Ensure all settings are correctly configured. Always test changes to confirm functionality. For further assistance, consult the manual or contact customer service. The Lorex Connect app is a powerful tool for managing your surveillance. Use it to customize your experience and capture only what matters. Ensure schedules are regularly reviewed and adjusted as needed. For detailed instructions, refer to the manual or online guides. The Lorex Connect app is a simple yet effective way to maximize your system’s potential. Use it to improve security and efficiency. Ensure all devices are properly configured. Always verify changes to ensure they work as intended. For additional help, visit the Lorex support website or contact customer service. The Lorex Connect app is a key feature for optimizing your surveillance experience. Use it to capture essential moments. Ensure schedules are accurate and up-to-date. For troubleshooting, refer to the manual or support resources. The Lorex Connect app is a critical part of your security setup. Use it to optimize your security setup. Ensure all settings are correctly configured. Always test changes to confirm functionality. For further guidance, refer to the manual or support resources. The Lorex Connect app is a powerful tool for managing your surveillance. Use it to customize your experience and capture only what matters. Ensure schedules are regularly reviewed and adjusted as needed. For detailed instructions, consult the manual or online guides. The Lorex Connect app is a simple yet essential step in customizing your Lorex system. Use it to enhance security and efficiency. Ensure all devices follow the schedule. Always verify changes to confirm they work as intended. For additional help, visit the Lorex website or reach out to customer service. The Lorex Connect app is a key feature for optimizing your surveillance experience. Use it to capture essential moments. Ensure schedules are accurate and up-to-date. For troubleshooting, refer to the manual or support resources. The Lorex Connect app is a vital part of your Lorex setup. Use it to streamline your monitoring and enhance security. Ensure all settings are correctly configured. Always test changes to confirm functionality. For further assistance, consult the manual or contact customer service. The Lorex Connect app is a powerful tool for managing your system. Use it to customize your surveillance and capture only what you need. Ensure schedules are regularly reviewed and updated. For detailed instructions, refer to the manual or online guides. The Lorex Connect app is a simple yet effective way to maximize your system’s potential. Use it to improve security and efficiency. Ensure all devices are properly configured. Always verify changes to ensure they work as intended. For additional help, visit the Lorex support website or contact customer service. The Lorex Connect app is a key feature for enhancing your surveillance experience. Use it to capture essential moments. Ensure schedules are accurate. Ensure all devices are properly connected. For troubleshooting, consult the manual or contact support. The Lorex Connect app is a critical part of your security setup. Use it to optimize your security setup. Ensure all settings are correctly configured. Always test changes to confirm functionality. For further guidance, refer to the manual or support resources. The Lorex Connect app is a powerful tool for managing your surveillance. Use it to customize your experience and capture only what matters. Ensure schedules are regularly reviewed and adjusted as needed. For detailed instructions, consult the manual or online guides. The Lorex Connect app is a simple yet essential step in maximizing your system’s potential. Use it to enhance security and streamline monitoring. Ensure all devices follow the schedule. Always verify changes to confirm they work as intended. For additional assistance, visit the Lorex website or contact customer service. The Lorex Connect app is a key feature for optimizing your surveillance experience. Use it to capture essential moments. Ensure schedules are accurate and up-to-date. For troubleshooting, refer to the manual or seek assistance. The Lorex Connect app is a critical part of your security setup. Use it to optimize your monitoring experience. Ensure all settings are accurate and up-to-date. For troubleshooting, refer to the manual or contact support. The Lorex Connect app is a vital part of your security system. Use it to improve security and streamline monitoring. Ensure all settings are configured correctly. Always verify changes to confirm functionality. For further guidance, refer to the manual or support resources. The Lorex Connect app is a powerful tool for managing your surveillance. Use it to customize your experience and capture only what matters. Ensure schedules are regularly reviewed and adjusted as needed. For detailed instructions, consult the manual or online guides. The Lorex Connect app is a simple yet effective way to customize your surveillance. Use it to capture essential moments. Ensure schedules are accurate and up-to-date. For troubleshooting, consult the manual or support resources. The Lorex Connect app is a vital part of your security system. Use it to improve security and streamline monitoring. Ensure all settings are configured correctly. Always verify changes to confirm functionality. For additional assistance, visit the Lorex support page or contact customer service. The Lorex Connect app is a key feature for maximizing your system’s potential. Use it to enhance your surveillance experience. Ensure all devices are included in the schedule if needed. Review and update schedules regularly to adapt to changing requirements. The Lorex Connect app is a critical component of your security setup. Use it to optimize your security setup. Ensure all settings are accurate and up-to-date. For troubleshooting, refer to the manual or contact support; The Lorex Connect app is a powerful tool for managing your surveillance. Use it to capture only what matters. Ensure schedules are configured correctly and regularly reviewed. For further guidance, consult the manual or online resources. The Lorex Connect app is a simple yet essential step in customizing your Lorex system. Use it to enhance security and efficiency. Ensure all devices follow the schedule. Always verify changes to confirm they work as intended. For additional help, visit the Lorex website or reach out to customer service. The Lorex Connect app is a key feature for optimizing your surveillance experience. Use it to capture essential moments. Ensure schedules are accurate and up-to-date. For troubleshooting, refer to the manual or support resources. The Lorex Connect app is a vital part of your Lorex setup. Use it to streamline your monitoring and enhance