Welcome to the Nintendo Switch Afterglow Wireless Controller manual! This guide helps you master the controller’s features, from wireless connectivity to customizable LED lighting, ensuring optimal gaming performance.
1.1 Overview of the Controller and Its Features
The Afterglow Wireless Controller offers a sleek, ergonomic design with enhanced comfort for extended gaming sessions. It features wireless connectivity, providing a stable and lag-free experience. The controller boasts prismatic LED lighting, allowing users to customize their glow with vibrant color options. Additionally, it includes motion controls, a rechargeable battery, and customizable button mapping for personalized gameplay. Designed for compatibility with the Nintendo Switch, this controller ensures seamless performance while offering a modern aesthetic.
1.2 Importance of the Manual for Optimal Use
This manual is essential for maximizing your Afterglow Wireless Controller experience. It provides step-by-step instructions for setup, customization, and troubleshooting, ensuring you unlock all features. From connecting wirelessly to adjusting LED settings, the guide helps you navigate every function seamlessly. Proper use of the manual prevents potential issues and enhances gameplay, making it indispensable for both new and experienced users to get the most out of their controller.
Key Features of the Afterglow Wireless Controller
Explore the Afterglow Wireless Controller’s standout features, including wireless connectivity, vibrant LED lighting, and intuitive motion controls designed to enhance your gaming experience effectively.
2.1 Wireless Connectivity and Range
The Afterglow Wireless Controller offers seamless wireless connectivity, providing a reliable range of up to 30 feet. Connecting is straightforward using the included USB-C cable to pair with your Nintendo Switch dock. The LED indicator on the controller pulses red while charging and turns white when fully charged, ensuring you’re always ready to play. This wireless freedom enhances your gaming experience, allowing you to enjoy your favorite games without the hassle of cables.
2.2 Prismatic LED Lighting Options
The Afterglow Wireless Controller features stunning prismatic LED lighting, offering a variety of customizable glow effects. Choose from multiple preset lighting modes that illuminate the controller’s design, enhancing your gaming ambiance. These vibrant lights are not just visually appealing but also add a personal touch to your gaming sessions, making the controller stand out while you play your favorite Nintendo Switch games. This feature allows for a unique and immersive gaming experience tailored to your style.
2.3 Motion Controls and Customization
The Afterglow Wireless Controller incorporates motion controls, enabling immersive gameplay for compatible Nintendo Switch titles. Customization options allow you to adjust button mapping and sensitivity, tailoring the controller to your preferences. The manual provides detailed steps for reconfiguring inputs and fine-tuning responsiveness, ensuring a personalized gaming experience. These features enhance precision and comfort, making the controller versatile for a wide range of games and playing styles.
Setting Up the Afterglow Wireless Controller
Start by unboxing and charging the controller using the USB-C cable. Connect it to the Nintendo Switch dock, wait for pairing, and enjoy wireless gaming freedom.
3.1 Unboxing and Initial Setup
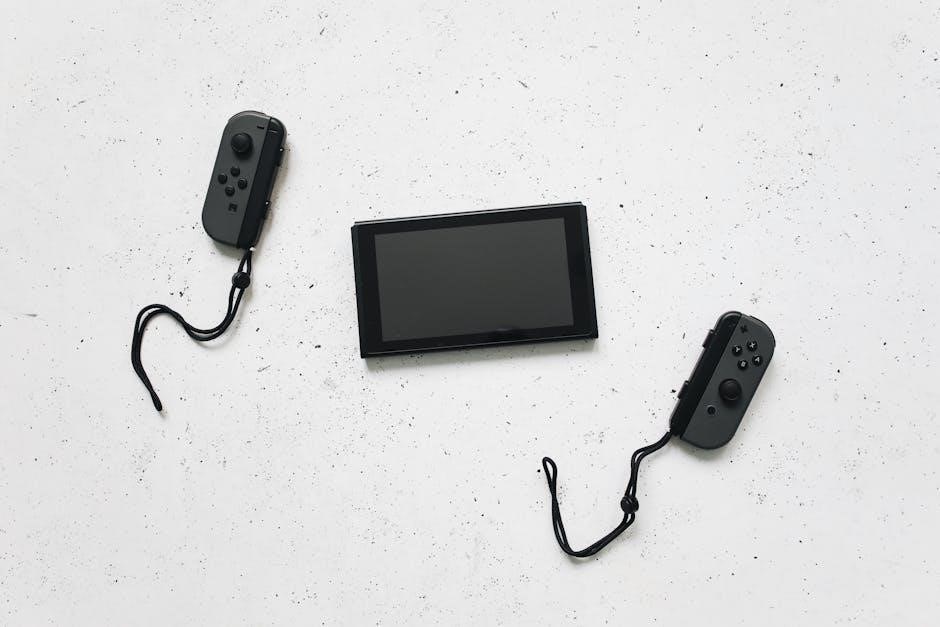
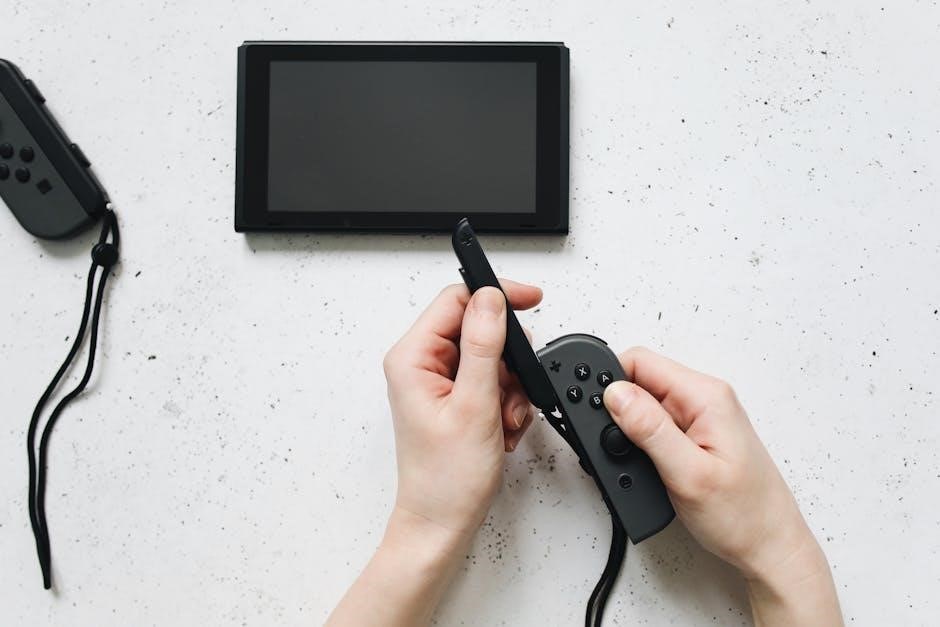
Begin by carefully unboxing the Afterglow Wireless Controller, ensuring all components, including the controller, USB-C cable, and quick start guide, are included. Before first use, charge the controller using the provided USB-C cable connected to the Nintendo Switch dock or a compatible USB port. Allow it to charge fully to ensure optimal battery life. Once charged, power on the controller and follow the on-screen prompts to pair it with your Nintendo Switch console;
3.2 Connecting the Controller to the Nintendo Switch
To connect the Afterglow Wireless Controller, plug the USB-C cable into the controller and the other end into a USB port on the Nintendo Switch dock. The LED indicator will illuminate red during charging and turn white once fully charged. With the controller charged, press and hold the PlayStation button until the LED pulses white, indicating pairing mode. On your Nintendo Switch, navigate to the Bluetooth settings under “Controllers and Sensors,” select the controller from the list, and follow the on-screen prompts to complete the pairing process.
3.3 Charging the Battery and LED Indicators
Charge the Afterglow Wireless Controller using the included USB-C cable. Connect one end to the controller and the other to a USB port on the Nintendo Switch dock. The LED indicator will pulse red while charging and turn white when fully charged. The battery provides up to 20 hours of playtime on a single charge. The LED also indicates pairing mode (flashing white) and low battery (rapid red blinking). Ensure the controller is charged before extended gaming sessions for uninterrupted play.
Customizing Your Gaming Experience
Personalize your gaming setup with adjustable LED lighting, button mapping, and sensitivity settings. Tailor controls to your preferences for a more immersive and enjoyable Nintendo Switch experience.
4.1 Adjusting LED Lighting and Glow Effects
The Afterglow Wireless Controller offers customizable LED lighting, allowing you to personalize your glow effects. Use the dedicated button to cycle through prismatic colors and patterns. Adjust brightness levels to match your gaming environment. The LED lighting enhances the controller’s aesthetic appeal while providing visual feedback during gameplay. Experiment with different settings to find your preferred style, ensuring a unique and immersive gaming experience. This feature is both functional and visually striking, making it a standout aspect of the controller’s design.
4.2 Configuring Button Mapping and Sensitivity
The Afterglow Wireless Controller allows you to customize button mapping and sensitivity to suit your gaming preferences. Use the included software or in-controller settings to remap buttons for optimal control. Adjust analog stick sensitivity to improve accuracy in games. Custom profiles can be saved for different gaming scenarios, ensuring a tailored experience. This feature enhances precision and comfort, making it ideal for competitive and casual gamers alike. Personalize your setup to maximize performance and enjoyment.
Troubleshooting Common Issues
Identify and resolve common issues like connectivity problems, LED malfunctions, or drift. Restart the controller, check battery levels, and recalibrate for optimal performance. Refer to the manual for detailed solutions to ensure smooth gaming experiences.
5.1 Resolving Connectivity Problems
If the controller fails to connect, ensure it’s fully charged and paired correctly. Restart the Nintendo Switch and controller, then reconnect via USB-C cable. Check for firmware updates and ensure the controller is in wireless mode. If issues persist, reset the controller by holding the PDP button for 10 seconds. LED indicators will confirm a successful connection. For persistent problems, consult the manual or contact support for further assistance.
5.2 Addressing Battery Life Concerns
If battery life is short, ensure the controller is charged fully using the USB-C cable. Reduce LED brightness or turn it off to conserve power. Avoid overcharging, as it may degrade battery health. If issues persist, reset the controller by holding the PDP button for 10 seconds. Check for firmware updates, as they often improve battery performance. Proper storage and maintenance can extend the controller’s battery lifespan and overall functionality.
5;3 Fixing LED Lighting Malfunctions
If the LED lights malfunction, restart the controller by holding the PDP button for 10 seconds. Check connections and ensure firmware is updated. Adjust brightness settings or reset to default lighting modes. If issues persist, contact support for assistance. Proper care ensures optimal LED performance and enhances your gaming experience with vibrant, customizable illumination. Regular updates and maintenance can prevent such malfunctions, keeping your controller’s LED features functioning smoothly.
Safety Precautions and Maintenance
Handle with care to avoid scratches or damage. Store in a dry, cool place away from direct sunlight. Avoid overcharging the battery. Clean with a soft cloth, no harsh chemicals. Regular firmware updates ensure optimal performance. Follow these guidelines for longevity and reliability.
6.1 Proper Handling and Storage
Handle the Afterglow Wireless Controller with care to avoid scratches or damage. Store it in a cool, dry place, away from direct sunlight. Use a soft cloth for cleaning, avoiding harsh chemicals. Protect the controller from excessive moisture and extreme temperatures. When not in use, store it in the provided case or a protective cover. Avoid overcharging the battery, as this can reduce its lifespan. Regularly clean the USB-C port with a gentle brush to ensure proper connectivity. Proper storage and handling will maintain the controller’s performance and extend its durability.
6.2 Updating Firmware and Software
Regularly updating the firmware and software of your Afterglow Wireless Controller ensures optimal performance and access to new features. Connect the controller to your Nintendo Switch dock using the USB-C cable. Navigate to the System Settings, then Controllers and Sensors, and select the appropriate option to check for updates. Follow the on-screen instructions to complete the update process. Updates can also be performed via a PC using the official software. Always ensure the controller is fully charged before updating. Do not disconnect the controller during the update process, as this may cause malfunctions. Refer to the official manual for detailed steps and troubleshooting tips.
The Nintendo Switch Afterglow Wireless Controller offers a seamless gaming experience with its advanced features and customizable options. This manual has guided you through setup, customization, and troubleshooting, ensuring you maximize its potential. Explore its wireless freedom, LED lighting, and motion controls to enhance your gaming sessions. Refer to this manual for any future adjustments or updates, and enjoy a superior gaming experience with your Afterglow Wireless Controller.
7.1 Summary of Key Takeaways
The Afterglow Wireless Controller enhances your Nintendo Switch experience with wireless freedom, customizable LED lighting, and motion controls. Proper setup, including charging and connectivity, ensures optimal performance. Customization options allow personalized button mapping and sensitivity adjustments. Troubleshooting tips address common issues like connectivity problems and battery life concerns. Regular maintenance, such as firmware updates and safe storage, prolongs the controller’s lifespan. By following this manual, you can unlock the full potential of your Afterglow Wireless Controller for an immersive gaming experience.
7.2 Recommendations for Use
To maximize your experience with the Afterglow Wireless Controller, use it in well-lit areas to fully enjoy the LED lighting effects. Regularly update the firmware to ensure optimal performance. For extended play sessions, keep the controller charged and avoid extreme temperatures. Experiment with customizable button mapping to suit your gaming style. Clean the controller regularly and store it in a protective case when not in use. By following these tips, you can enjoy a seamless and immersive gaming experience with your Afterglow Wireless Controller.