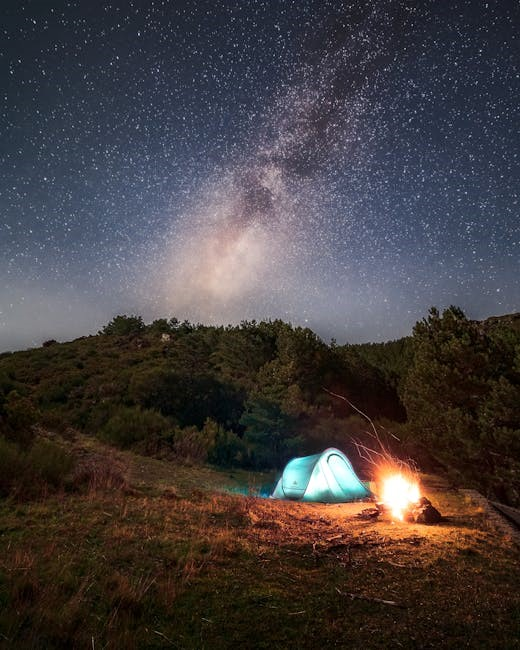
The Kelty Ridgeway Tent is a spacious 10-person camping tent designed for family and group adventures. It features multiple rooms, a screened porch, and ample storage, making it ideal for comfortable and organized outdoor stays.

Preparing for Setup
Begin by selecting a flat, even area and clearing it of sticks, rocks, and debris. Ensure the ground is firm and dry for optimal stability. Gather all components and organize them for efficient assembly.

Choosing a Suitable Location
When setting up the Kelty Ridgeway Tent, selecting the right location is crucial for a safe and enjoyable camping experience. Look for a flat, even area to ensure proper tent stability and avoid uneven ground that could cause imbalance. Clear the site of sticks, rocks, and debris to prevent damage to the tent floor and ensure a smooth setup process. Additionally, choose a spot with good drainage to avoid water pooling in case of rain. Opt for a location with minimal overhead obstacles, such as tree branches, to reduce the risk of damage from falling debris. If possible, position the tent in a shaded area to regulate temperature and provide relief from direct sunlight. Always ensure the area is large enough to accommodate the tent’s dimensions, including the screen porch and multiple rooms. Avoid setting up in low-lying areas where water may collect during rainfall. By carefully selecting your campsite, you can ensure a secure and comfortable setup for your Kelty Ridgeway Tent.
Unpacking and Organizing Components
Unpacking and organizing the components of the Kelty Ridgeway Tent is the first step toward a smooth setup process. Begin by carefully removing all items from the storage bag, including the tent body, poles, stakes, rainfly, and instructions. Lay out each component on the ground to ensure everything is accounted for and easily accessible. This helps avoid confusion and saves time during assembly; Separate the tent poles into groups based on their lengths and labels, as they are designed to fit specific sections of the tent. Store the stakes and guy lines in a designated area for quick access when securing the tent. It’s also a good idea to organize smaller parts, such as pole connectors and clips, in a separate pile to prevent them from getting lost. Finally, take a moment to review the instructions and familiarize yourself with the components before proceeding. Proper organization ensures a hassle-free and efficient setup experience.
Setting Up the Tent
Setting up the Kelty Ridgeway Tent is straightforward with its intuitive design. Start by assembling the poles, attaching them to the tent body, and securing the structure with stakes. Ensure the tent is tightly pitched for stability and weather resistance.
Assembling the Tent Poles
Assembling the tent poles for the Kelty Ridgeway Tent is a critical step in the setup process. Begin by sorting the poles according to their lengths and labeling. Attach the pole segments together by aligning the shock-corded ends, ensuring they snap securely into place. Avoid allowing the sections to snap harshly, as this may cause damage or stress fractures. Use the color-coded labels on the poles and tent sleeves to guide proper alignment. Once fully assembled, the poles should form a sturdy frame ready for attachment to the tent body. Handle the poles with care to prevent bending or denting, as this can compromise the structural integrity of the tent. Proper assembly ensures a stable and secure shelter, making your camping experience comfortable and enjoyable.

Attaching the Tent to the Poles
Attaching the Kelty Ridgeway Tent to the assembled poles is a straightforward process that requires precision and care. Begin by locating the pole sleeves on the tent body, which are typically marked with color-coded labels to match the corresponding poles. Slide the poles through the sleeves, ensuring they align properly with the tent’s framework. Once the poles are fully inserted, attach the tent clips to the pole ends, securing them firmly. For additional stability, connect the hooks or elastic ties on the tent to the pole segments. Gently pull the tent upward to ensure it is evenly spread and taut. Make sure all corners and edges are securely attached to the poles to maintain structural integrity. If using the rainfly, attach it according to the manufacturer’s instructions. Properly attaching the tent to the poles ensures a stable and weather-tight shelter, essential for a comfortable camping experience.
Securing the Tent with Stakes
Securing the Kelty Ridgeway Tent with stakes is essential for stability and safety. Start by ensuring the tent is laid out flat on even ground, free from debris. Begin staking at the corners, driving stakes straight down into the ground to avoid fabric stress. Use a hammer or rock if the ground is hard. Stake opposite corners first to spread the tent evenly, then move on to the sides, ensuring the walls are taut. Be cautious not to over-tighten, as this could damage the fabric. Check for color-coded tabs or reinforced areas for guidance. After securing the main tent, attend to the rainfly, staking it separately to ensure it’s tight and water-resistant. Finally, inspect the tent by walking around and tugging gently to ensure all areas are secure. Adjust stakes as needed for optimal stability, especially in windy or rainy conditions.

Additional Features
The Kelty Ridgeway Tent offers a screened porch for bug-free relaxation, multiple rooms with privacy curtains, and ample storage pockets. Weather-resistant fabric and high ceilings enhance comfort and functionality for family and group camping adventures.
Installing the Rainfly
Installing the rainfly on the Kelty Ridgeway Tent is a crucial step to ensure weather protection. Start by locating the rainfly, which is designed to cover the top of the tent. Attach the rainfly clips to the tent’s pole ends, ensuring they are securely fastened. Next, align the rainfly with the tent’s roof, matching the designated hooks or loops to the corresponding poles. Use the provided guy lines to tighten the rainfly, ensuring a snug fit. For additional stability, stake the rainfly’s corners to the ground. Make sure the rainfly is taut to prevent water from pooling. If needed, adjust the tension on the guy lines for optimal coverage. Proper installation of the rainfly will help keep the tent dry and secure during rainy conditions. Always ensure the rainfly is properly seated and tightened before exposure to weather.
Setting Up Multiple Rooms and Screen Porch
The Kelty Ridgeway Tent offers versatile living spaces, including multiple rooms and a screened porch. To set up the rooms, attach the room dividers to the main tent using the provided clips and hooks. Ensure the dividers are securely fastened to create separate sleeping or storage areas. For the screen porch, locate the designated attachment points on the tent and connect the porch structure using the included poles and clips. Tighten the porch securely to the main tent frame. Stake the porch’s edges to the ground for stability. Once set up, the screen porch provides a bug-free zone for relaxation. Use the privacy curtains to enclose the rooms for added seclusion. Properly organizing the rooms and porch will maximize space and comfort during your camping trip. Ensure all connections are tight and adjustments are made for a sturdy setup.
Organizing and Storage
Organizing your Kelty Ridgeway Tent is essential for a comfortable and functional camping experience. The tent features multiple storage pockets and gear lofts to keep essentials within easy reach. Use the pockets to store small items like flashlights, snacks, and toiletries, while the gear lofts can hold larger items such as extra clothing or gear. For added convenience, attach hooks or clips to hang items like lanterns or bags from the tent’s ceiling.

Consider designating specific areas for different activities. The screen porch can serve as a storage space for muddy boots or outdoor gear, keeping the main living area clean. Roll up and secure any unused bedding or clothing to save space; Regularly tidy up to prevent clutter from building up. Proper organization ensures a more enjoyable and stress-free camping experience.
After your trip, store the tent in a clean, dry environment to maintain its condition. This will help extend the tent’s lifespan and ensure it remains ready for future adventures. Always follow the manufacturer’s storage guidelines for optimal results.
Maintenance and Cleaning
Regular maintenance and cleaning are crucial to extend the lifespan of your Kelty Ridgeway Tent. Start by inspecting the tent for dirt, debris, or mildew after each use. Spot clean stains or spills with a damp cloth, avoiding harsh chemicals that may damage the fabric. For deeper cleaning, hand wash the tent with mild soap and lukewarm water, but avoid machine washing as it can cause damage.
Always allow the tent to air dry completely before storing it. Never machine dry or expose it to direct sunlight for extended periods, as this can cause fading or material degradation. Store the tent in a cool, dry place, away from moisture, and use the original storage bag to protect it from dust.
Regularly inspect the tent for signs of wear or damage, such as torn seams or broken zippers, and address these issues promptly. Applying a waterproofing spray to the tent’s exterior can help maintain its weather resistance. By following these maintenance steps, you can ensure your Kelty Ridgeway Tent remains in excellent condition for future adventures.
Remember, all items returned for repair must be clean, as Kelty does not wash tents. Dirty tents will be returned to the sender for cleaning before any repairs are made.

Troubleshooting Common Issues
When using the Kelty Ridgeway Tent, common issues can arise, but most are easily solvable with proper troubleshooting. One frequent problem is pole damage, often caused by sudden impacts or improper assembly. Always avoid snapping pole sections together, as this can lead to stress fractures. If a pole breaks, use the included repair sleeve to temporarily fix it until a permanent solution is found.
Another issue is water leakage, which may occur if the tent isn’t properly sealed or if the rainfly isn’t securely attached. Ensure all seams are tight and consider applying a waterproofing spray for added protection. If leaks persist, inspect the fabric for pinholes or tears and repair them with a tent patch kit.
Zipper malfunctions are also common. Clean zippers regularly with a soft brush or cloth to remove dirt and debris. If a zipper gets stuck, gently lubricate it with silicone spray. For persistent issues, contact Kelty’s customer service for assistance or replacement parts.
Warranty and Repair Information

Kelty offers a comprehensive warranty program for the Ridgeway Tent, covering defects in materials and workmanship for a specified period. For detailed warranty terms, refer to the user manual provided with your tent. If your tent requires repair, ensure it is clean before sending it to Kelty, as dirty items are returned unprocessed.
For warranty and repair inquiries, contact Kelty’s customer service at 800-535-3589 or visit their office at 6235 Lookout Rd Suite C, Boulder, CO 80301. Always include proof of purchase and a detailed description of the issue when requesting repairs. Kelty also provides replacement parts for damaged components, such as poles or stakes, to help extend the life of your tent.
In case of minor damage, such as pole fractures or fabric tears, use the included repair kit or purchase aftermarket solutions like pole sleeves and patch kits. Regular maintenance and proper storage can prevent many issues, ensuring your Kelty Ridgeway Tent remains in great condition for years of outdoor adventures.